
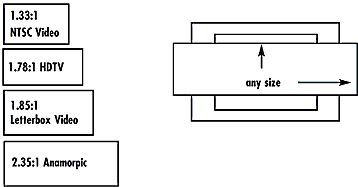
So you are thinking about a home theater. Size matters when it comes to an exciting home theater. Maybe you are just thinking about a home theatre or have actually done some shopping. Maybe you did your thinking and shopping last year but just never got the project started – well, plenty has changed. One of your first decisions must be an idea of what screen size you will like. If you are looking for a nice 35” picture then you have many choices and lots of shopping to do. If you would like a little bigger image like a 50” picture then you still have some choices but your pockets must be a lot deeper. However, if you want an impressive 80”, 100”, 120” or even larger picture then the good news is your pockets do not need to be deep at all. Your only choice is to install a front projector and a projection screen. Once you have made this decision you need only pick the projector and the projector screen material or use a diy projection screen paint.
One really good source for projector shopping is projectorcentral.com . They have great search tools and very thorough reviews. They can then tell you who is selling this projector and at what price. The really good news is that front projector prices have recently fallen below $1000.00 for a good quality projector. And while the cost of a projector have become so affordable the projectors brightness, contrast ratio and many other performance factors have improved dramatically. The life size image and the low cost of a front projector paired with projector screen paint make this a winning combination for a super home theater entertainment project.
Remember when your dad was setting up for those boring sessions where the family got together and watched Super 8 movies, or worse yet slides from your aunt’s vacation? Dad would pull out the old tripod projection screen and open it up; you hung around because you got to play with the glass beads that fell off projection screen material when he opened the screen. He would then set the projector up as far back as needed to make the picture fill the screen. Those were the “good ol’ days”. That square screen simply will not work today.
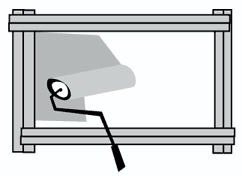
Projectors and media have made quantum leaps. Film is gone, and video can be on computer memory or a DVD. Traditional projection screens come in standard sizes like 80”, 96” or 100” sizes but ask for a custom size that is not “standard” and people will look at you like you grew a third eye. They may take your order and the price skyrockets, and what is the lead-time? What will the screen size be after a year when the screen has had time to “breathe” and all the plasticizer has leached to the surface, thereby shrinking the screen and making it wrinkled and sticky? Some screens could shrink as far as 2.5%, leaving you with a nominal 100” diagonal at 98.5”. Were traditional types of screens ever properly engineered to be so large? See this comparison of screen surface quality. There is hope and a better alternative for those do-it-yourselfers who want the BIG screen experience. A projector screen paint puts you in full control.
A cost saving method is on the market that allows you to FULLY control the size of the screen at the time of installation. No longer are you “stuck” to a standard screen size, and better yet, you will always be able to fill the screen completely. To make things even better, the screen will remain the exact same size it was the day you installed it and it will not get sticky like vinyl’s do with age. Traditional projection screen materials are made of painted fiberglass or cast vinyl and are often priced even higher than projectors even in standard sizes. Make it a custom size or add electric roll up and the prices are out of reach. That money is much better saved or used for upgraded sound or other home theater features.
Do-it-yourself kits are just recently available for less than $200 that allow you to “paint” your screen on the wall or other surface in any size or format you desire. This quantum leap allows you to set your projector where you want it and adjust your image to the size you want. If your wall has texture, paneling, brick or wallpaper that is no problem as this type of diy projector screen material will work well with any type of paintable substrate like sheet rock, MDF or even acrylic sheet. While most people would prefer not to wire things, most are willing to paint. A do-it–yourself projection screen paint is simple and even novices can achieve great results.
Here is where the size of a projection screen really matters. Most projector models will claim in their specification that you can project an image up to 300” diagonal. While this may be true, that is an image size that will be much too large for a home theater. Yet a big image does make a great home theater experience. A survey of recent diy projector screen paint customers finds typical screen sizes between 90” and 140” diagonal and typically not in “standard” sizes. For example they may find that 118 3/4” works best in their theater. They also install the screen with multiple formats for use with all media.
The favorite feature of diy projector screen paint is that you have full control. Let’s take a closer look at how this works and makes your diy theatre so easy to install. Let’s assume you are planning to mount your projector from the ceiling. Once you purchase your front projector we recommend that you place your projector on a table or ladder and project on to the wall. Do not worry about the exact image size yet. This step is just to make sure that your planned mounting location is good for the possible image size you intend to build. Then permanently mount the projector and connect it to the media source and project again. Now is the time to play with the image size as well as the height on the wall. Notice there is a trade off between size and picture sharpness and image brightness. This is the beauty of being in control. No two home theaters are alike. The size of your room and the distance and arrangement of your seating will influence what looks best to you in your diy theatre. You can see what looks just right for you and you do not need any specifications or measurements.
Now for the easy part. You do not need to worry about where to hang the projection screen material. You can simply mark and tape off the area where you want the image in multiple
formats and apply the diy projector screen paint. It really is that simple. A projector screen paint from www.diytheatre.com even offers a selection of contrast levels to tailor the screen to your projector performance and ambient light conditions.
There are several advantages to our "paintable" screen. The most important is that we do feel strongly that our active optical pigments are superior to those used in traditional fabric or vinyl screens. This also gives you full control over the height and size of the image – no custom sizes needed. Our screen will not wrinkle and the edges will not curl in – it will always be flat on your wall. All this and it is less expensive. Our product is water based and very consumer friendly. There are no solvents or that typical chemical and ammonia smell of regular paint.
You will then want to frame your screen with a simple chair rail or crown molding material that is painted flat black to finish. However, some prefer to use the same stain that is used in the rest of the room décor. Now you need only sit back and enjoy a great theater experience in your own home. The project can really be that simple and you will feel a lot of satisfaction with the results that YOU created. Your family and friends will agree that SIZE MATTERS!
Whether you choose a DIY Theatre Projector screen kit or some other material, DIY Theatre hopes you consider these fundamental options to optimize your theater experience

About Richard Burrows
Richard Burrows, Ph.D. has over 12 years of experience dedicated to research and development of projection screen materials. As a Doctor of Chemistry he has immersed himself in the field of optics and how new technologies can improve front projection screen performance. Dr. Burrows currently consults with several companies including DIY Theatre, LLC which can be found at www.diytheatre.com DIY Theatre is a manufacturer of diy projection screen materials. They offer a line of front projection screen paints that feature full control over the final projection screen size at a substantial cost savings over traditional projection screens. DIY projector screens paints can be ordered direct on-line at DIY Theatre Products and Pricing with no need for exact screen or image measurements.
Following are some recent projects sent to us our customers:
Josh, Nashville, Tennessee
Command and Control, Hong Kong
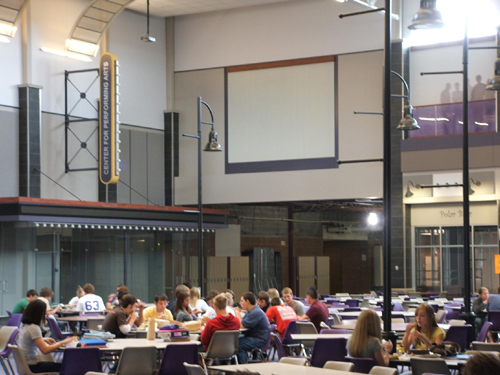
Jackson High School, Ohio
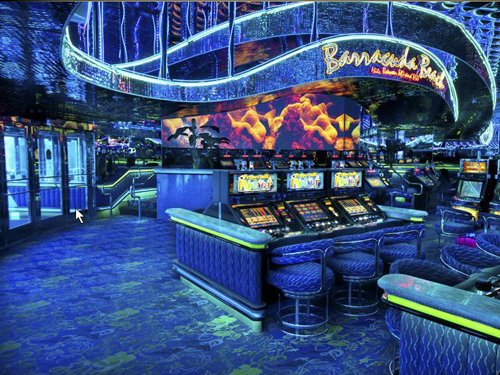
PepperMill Casino, Reno, Nevada